How to Deposit
Glow makes it easy to earn interest on your assets. Instead of letting them sit idly in a wallet, you can deposit your assets with just a couple clicks to immediately begin lending to borrowers and earn the displayed APY for that asset!
Glow Finance offers multiple easy ways to deposit assets into their margin accounts, as long as you have already created a margin account.
Glow Finance ensures that depositing is seamless, whether you're navigating from the Markets page, the Portfolio Dashboard, or using the quick-access Deposit button.
Regardless of the method, all deposit actions ultimately lead to the Asset Details Page, where you can confirm the amount and complete the transaction.
Once your wallet is connected and your margin account is created, you can follow these steps to deposit your assets:
1. Using the Top-Right Deposit Button
- Step 1: In the Margin Account Panel, locate the Deposit button in the top-right corner.
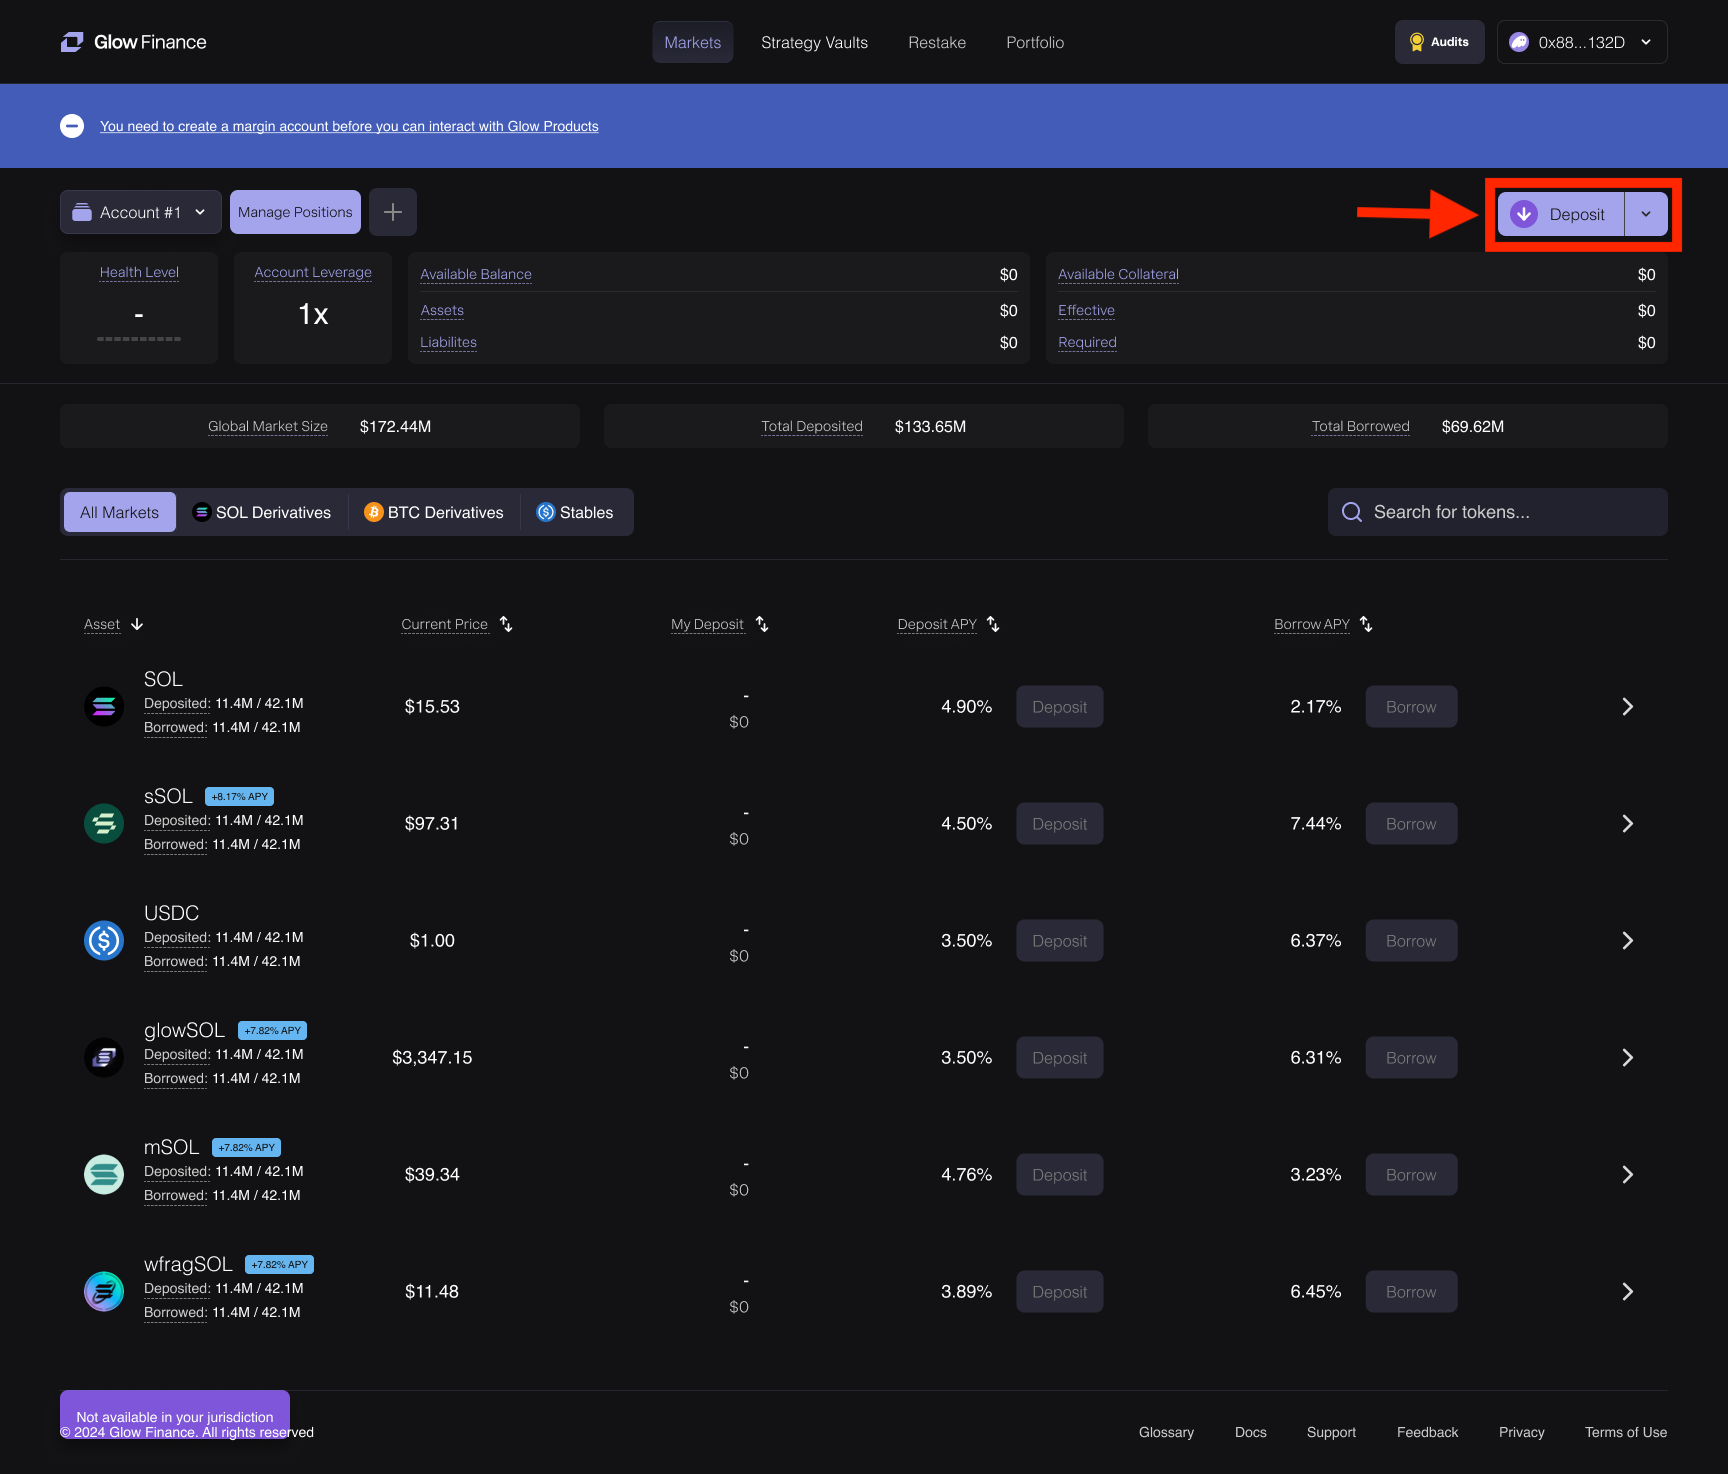
- Step 2: Select the desired asset to deposit.
2. Review Your Deposit Before Confirmation
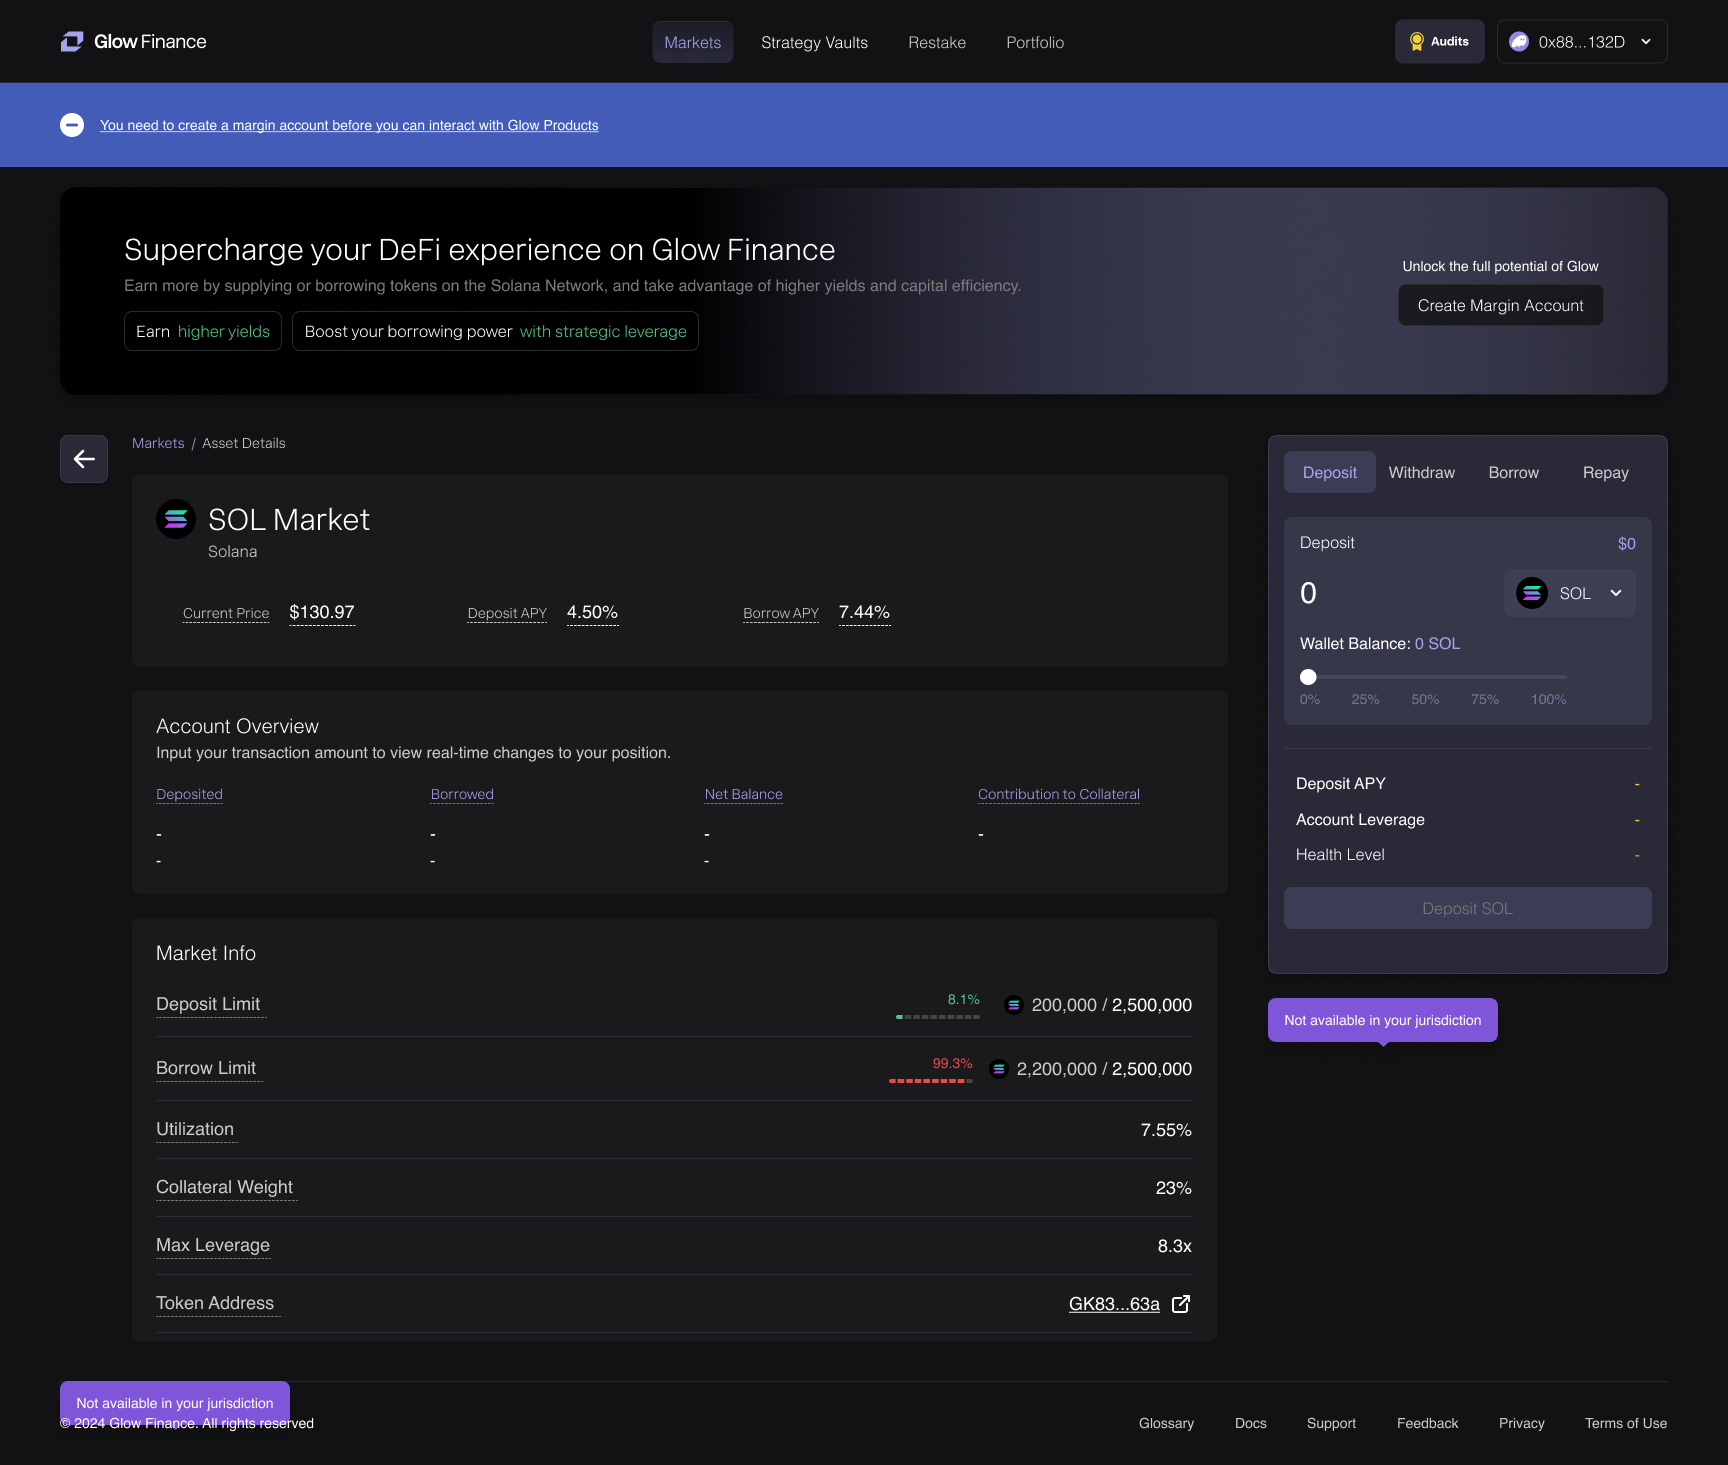
To review and confirm a deposit, Glow gives you a powerful Asset Details Page that shows a preview of how your margin account will change:
Account Overview
In the center of the Asset Details Page, the Account Overview panel shows current key metrics for the asset you're depositing and how they will change after the deposit.
All yellow values represent real-time projected changes based on the amount you're entering. This gives you full transparency before you commit to the transaction.
Deposited
- The amount of a given asset currently deposited in Glow Finance.
- This balance earns deposit APY and can be used as collateral for borrowing.
Borrowed
- The amount of an asset borrowed against the user’s deposited collateral.
- This amount accrues borrow interest (APY) until repaid.
Net Balance
- Represents the difference between deposited and borrowed amounts for a given asset.
- Useful for tracking overall holdings, but not a direct risk indicator for liquidation.
- Does not account for collateral weight or Health Level, meaning it’s not the best metric to assess borrowing risk.
Contribution to Collateral
- Refers to the amount of Effective Collateral added (if the given assets is net deposited, meaning more tokens are deposited than borrowed) or detracted (if this asset are net borrows, meaning more tokens are borrowed than deposited) to the margin account due to the deposit.
- The true measure of margin health — shows how much of your deposits are securing borrow positions.
- A negative value in the Contribution to Collateral row means this asset is reducing your account’s effective collateral by the amount shown. In contrast, a positive value means the asset is adding to your effective collateral. If your effective collateral drops below your required collateral, your available collateral becomes zero or negative — at which point liquidation becomes imminent.
- Unlike Net Balance, Contribution to Collateral directly impacts your Health Level and borrowing power.
Key Takeaway:
- Net Balance ≠ Risk Indicator – It only shows deposits vs. borrows.
- Monitor Contribution to Collateral, not just Net Balance, to stay safe to stay safe and aware of the effect each deposited token has on your account while optimizing your borrowing strategies.
- Contribution to Collateral value shows how much a specific asset is contributing to or detracting from your Effective Collateral. A positive value means the asset adds to your account’s effective collateral. A negative value means the asset reduces your effective collateral. If your Effective Collateral – Required Collateral ≤ 0, your account is at risk of liquidation.
Deposit Panel
On the right side, the Deposit Panel also updates to reflect key changes that would occur after confirming the deposit:
- Deposit APY: Shows how your personal APY for this asset will improve after the deposit.
- Account Leverage: Projects how your overall account leverage will shift.
- Held in Wallet: Lets you easily adjust how much to deposit based on your balance.
Again, all updated values appear in yellow — making it clear what the impact will be before you click Deposit SOL.
3. From the Markets Page
- Step 1: On the Markets page, identify the asset you want to deposit.
- Step 2: Click the Deposit button next to the desired asset (this action will open the Asset Selection Panel).
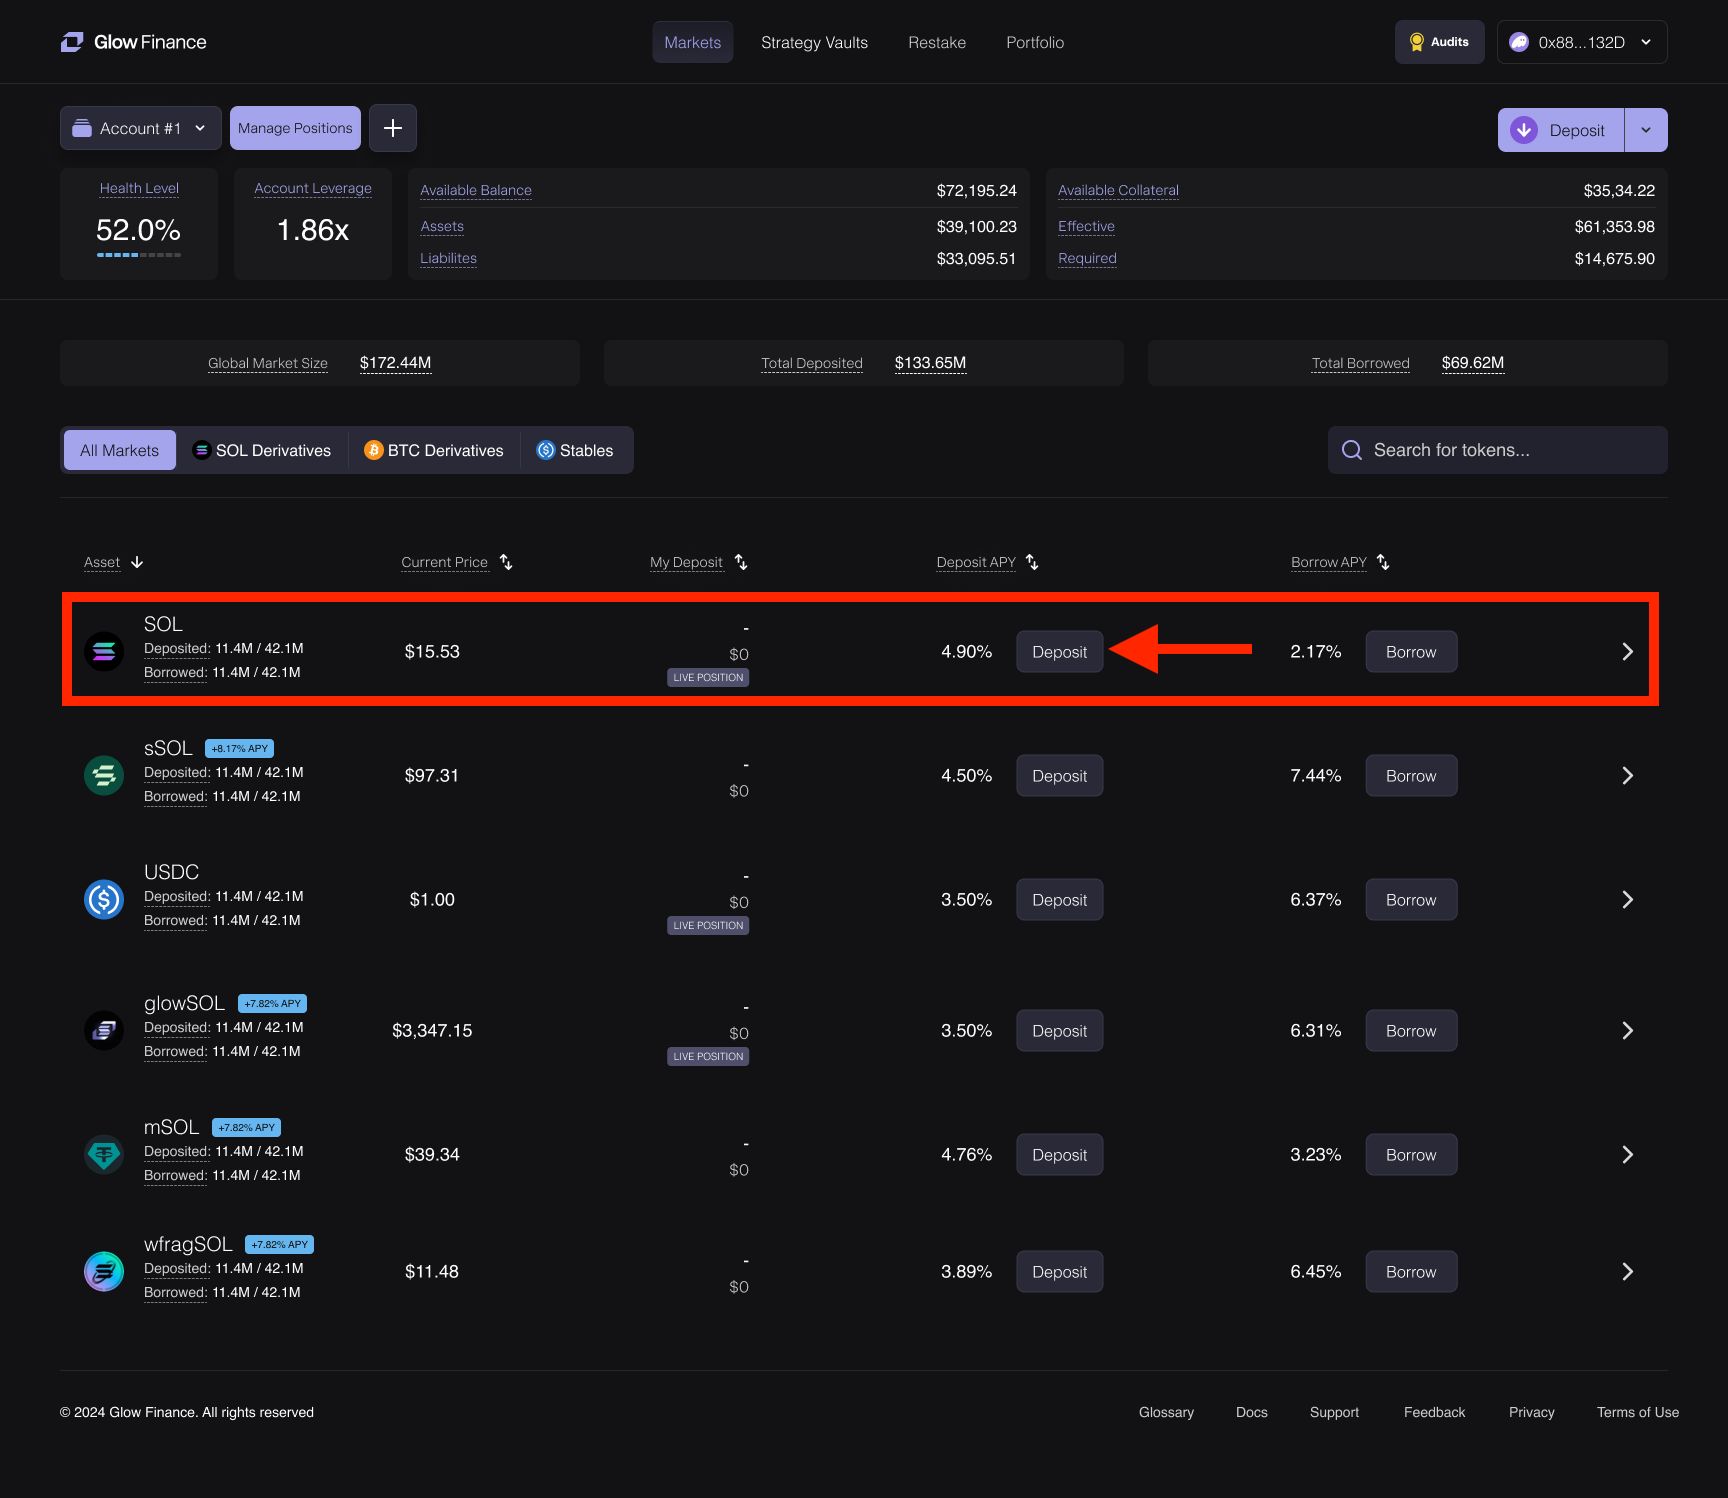
- Step 3: Finalize your deposit on the Asset Details Page.
4. By Clicking Asset Rows in the Markets Page
Note that Any asset row in the Markets or Portfolio pages is clickable, making the deposit process efficient. Clicking a row automatically selects the asset and deposit action.
- Step 1: On the Markets page, click the row of the asset you wish to deposit. For example, clicking on the SOL row directly takes you to the Asset Details Page.
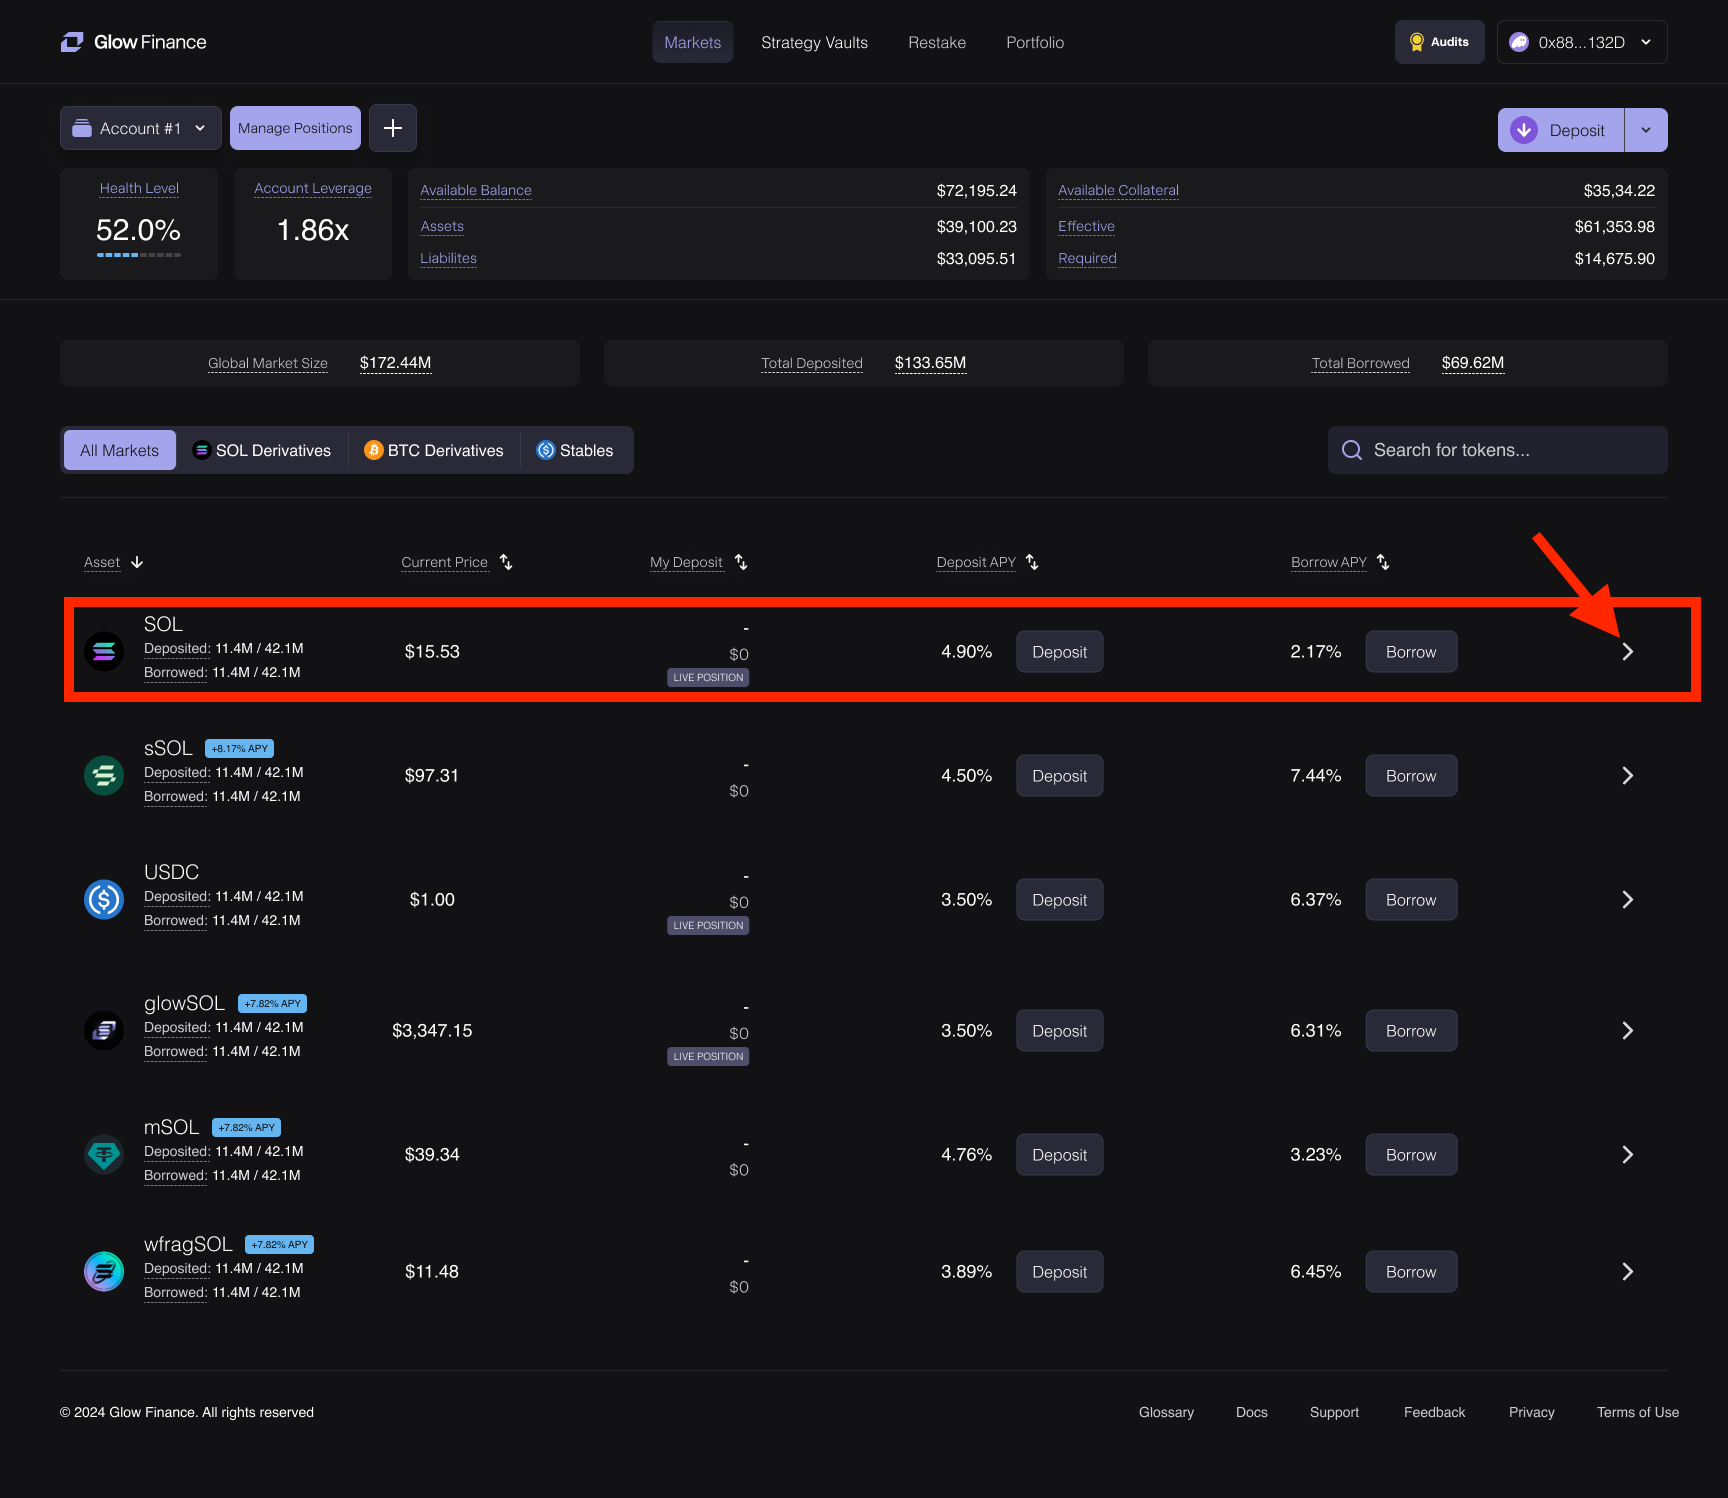
- Step 2: The deposit action will be pre-selected for this asset. Simply input the deposit amount and confirm the transaction.
5. From the Portfolio Dashboard
- Step 1: Navigate to the Portfolio Dashboard to manage your accounts.
- Step 2: Click on the Manage Positions button for the margin account where you wish to deposit assets.
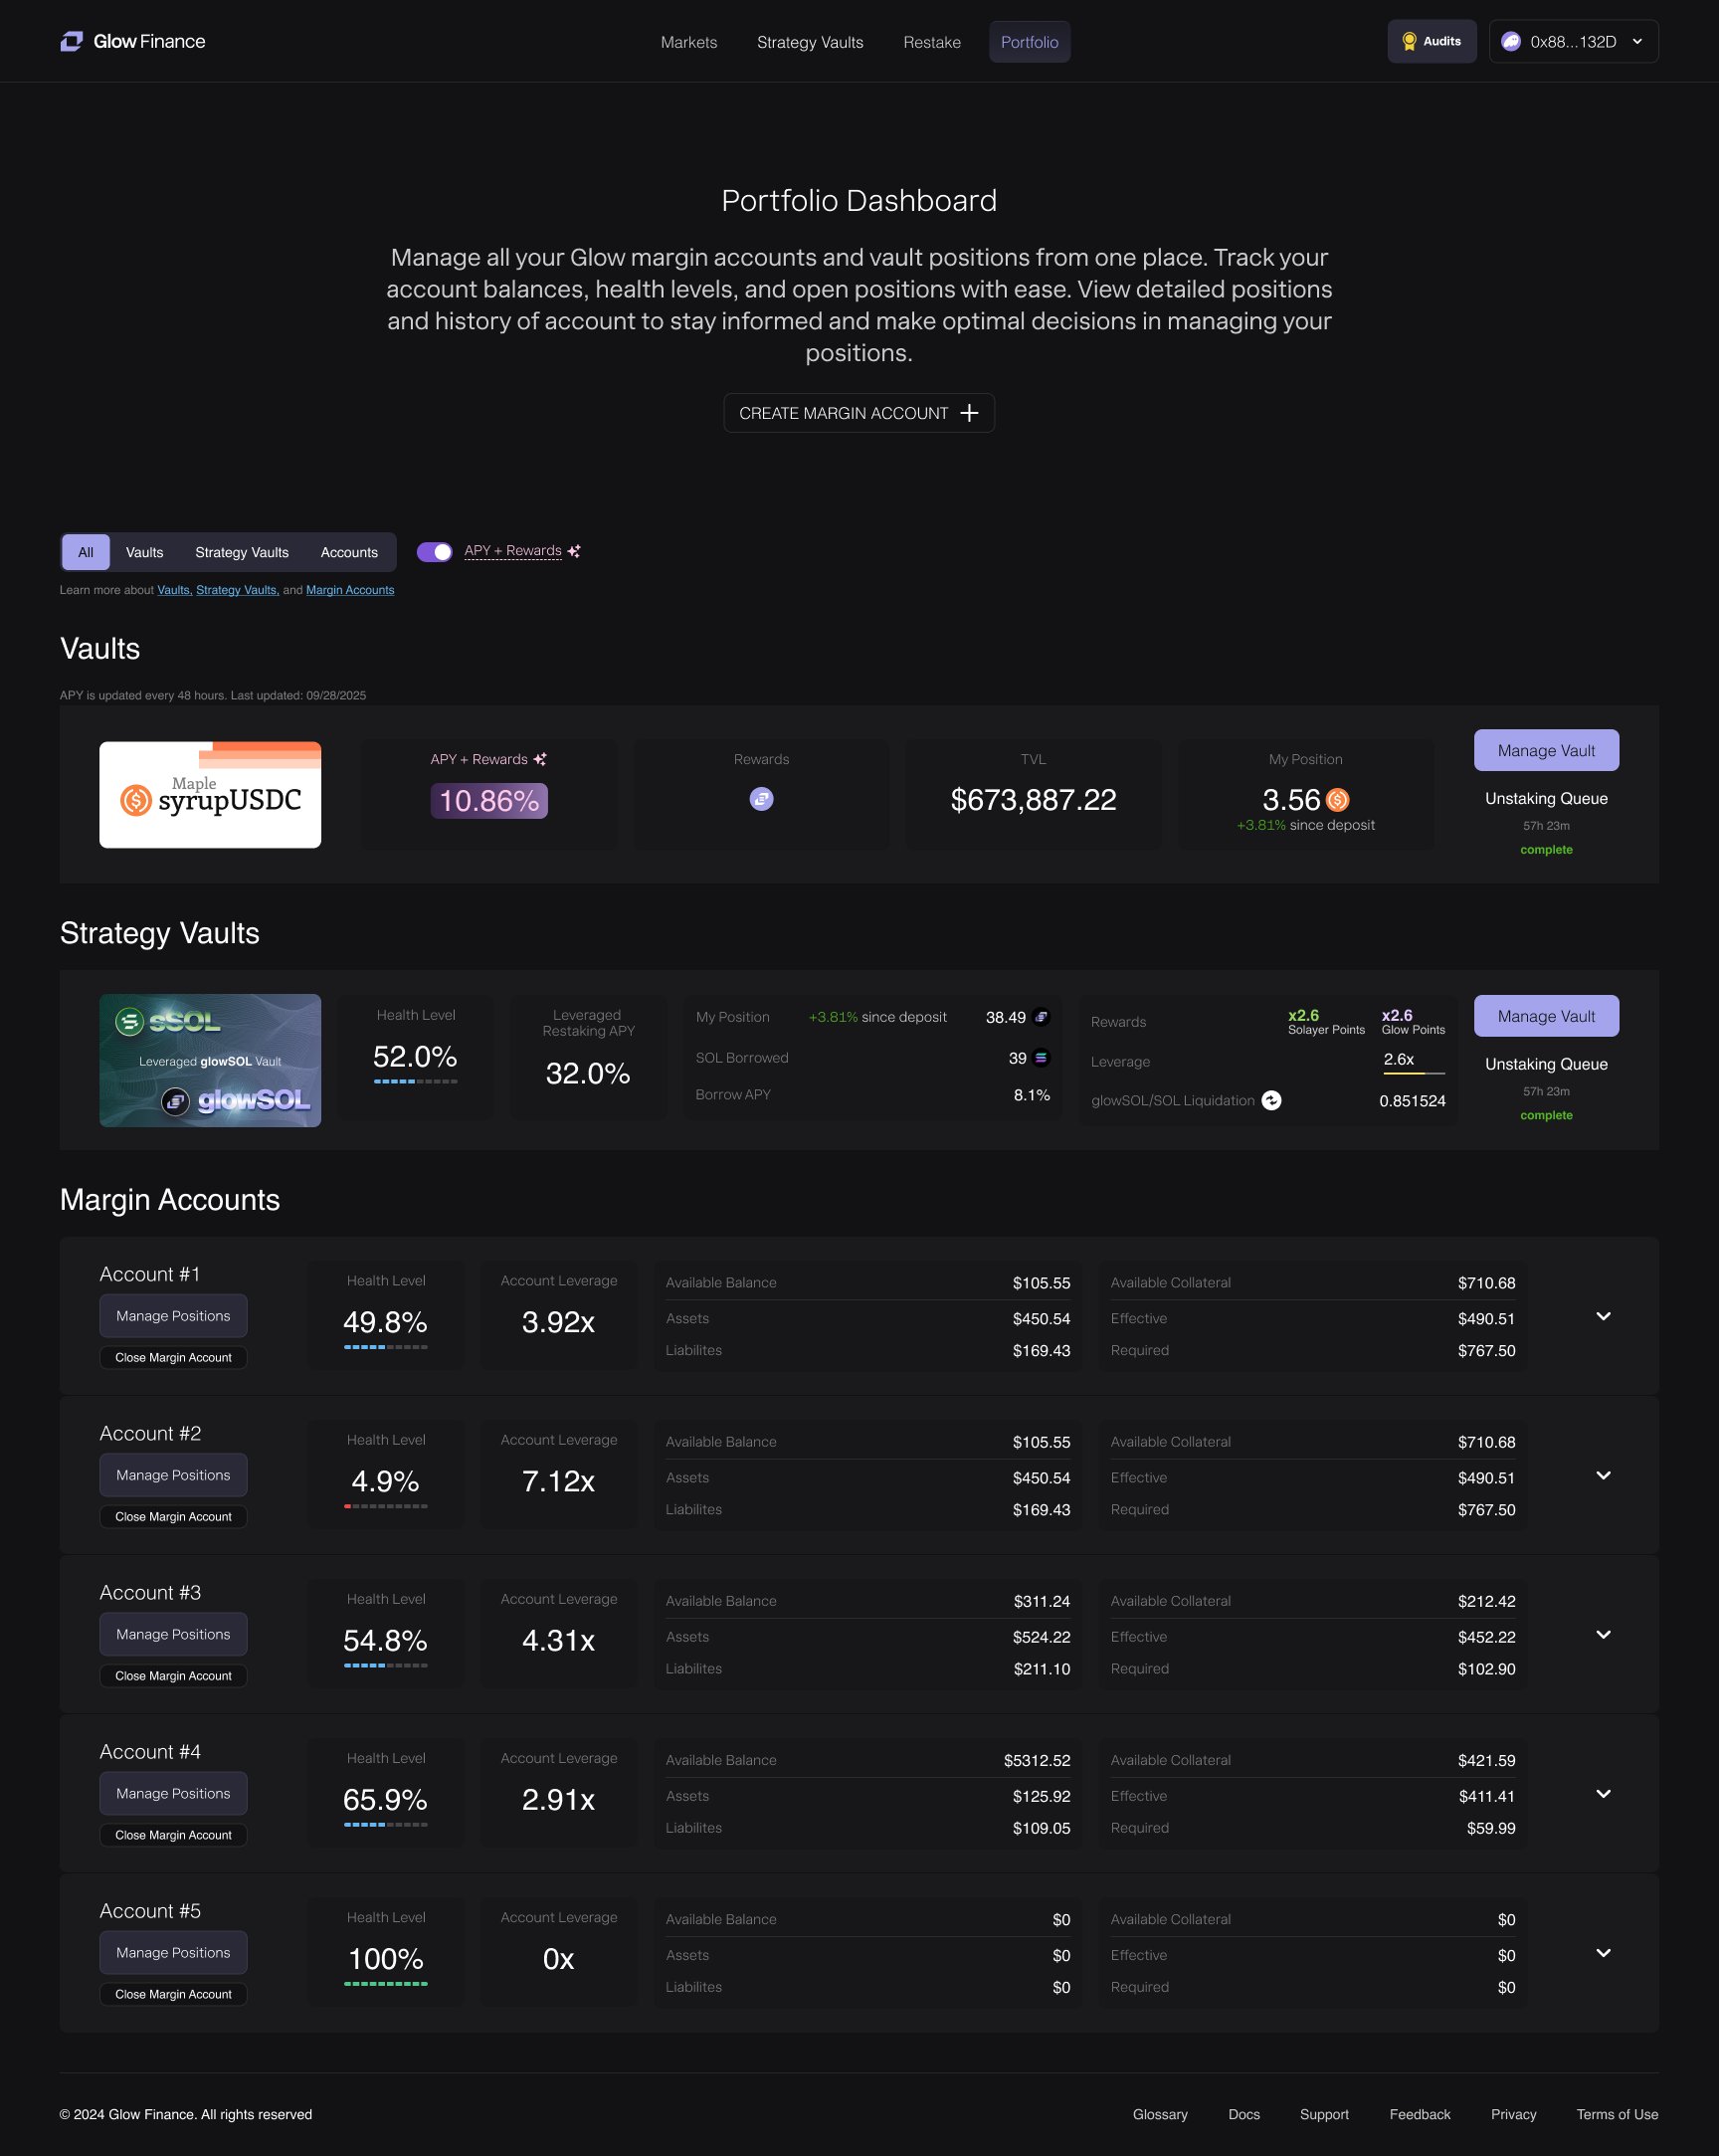
- Step 3: Select the asset row, which works similarly to the Markets Page, and proceed to the Asset Details Page with the deposit action pre-selected.