How to Create a Margin Account
This guide explains the steps involved in creating a margin account, the Solana blockchain requirements, and the visual indicators Glow uses to help users through the process.
A margin account is a necessary prerequisite for interacting with the Glow Finance application, enabling access to its full range of features and functionalities. Glow margin accounts underpin the interaction between a user's wallet and the Glow Protocol on-chain programs. With just a few clicks, you can create your margin account and unlock the full potential of Glow's innovative DeFi products.
Glow even supports creating multiple margin accounts under a single wallet, thus allowing risk segmentation and strategy isolation.
Prerequisites
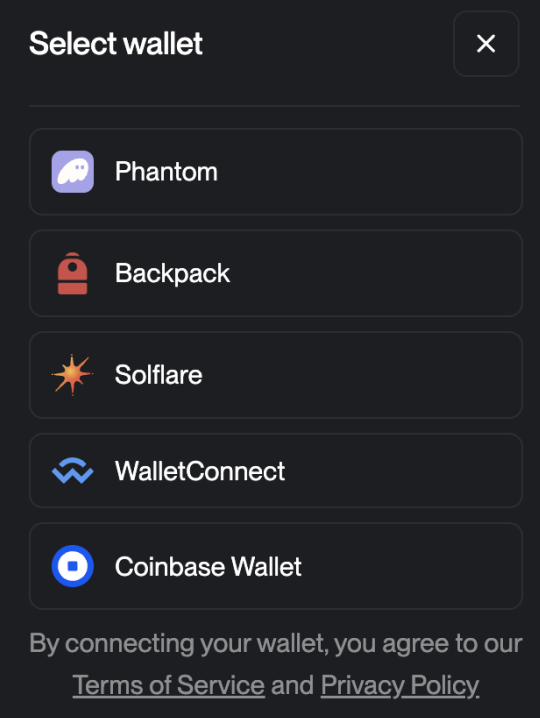
- Wallet Connection: Ensure your wallet (Phantom, Backpack, Solflare, WalletConnect, or Coinbase Wallet) is connected to the Glow platform. Glow supports multiple wallets for seamless integration.
- SOL Balance Requirement: You must have at least 0.072 SOL in your wallet to cover the one-time, refundable rent fee required by Solana for on-chain storage. You can close a margin account from the Portfolio page and receive the full rent fee back to your wallet.
- Multiple Accounts = Additional Rent Fees: Each additional margin account requires an additional rent fee.
The rent fee does not cover SOL needed for transaction processing. Transaction fees are typically minimal, averaging less than 0.001 SOL per transaction.
Key Visual Indicators
- Tooltips: If no margin account exists, tooltips on actions like Deposit, Withdraw, Borrow, or Repay buttons will display "Create a margin account first."
- Disabled Buttons: If the wallet is not connected or has insufficient SOL, action buttons will be disabled. For instance, if your wallet balance is less than 0.072 SOL, the modal for creating a margin account will indicate that the required balance is insufficient, and you will need to top up your wallet to continue.
Step 1: Connect Your Wallet
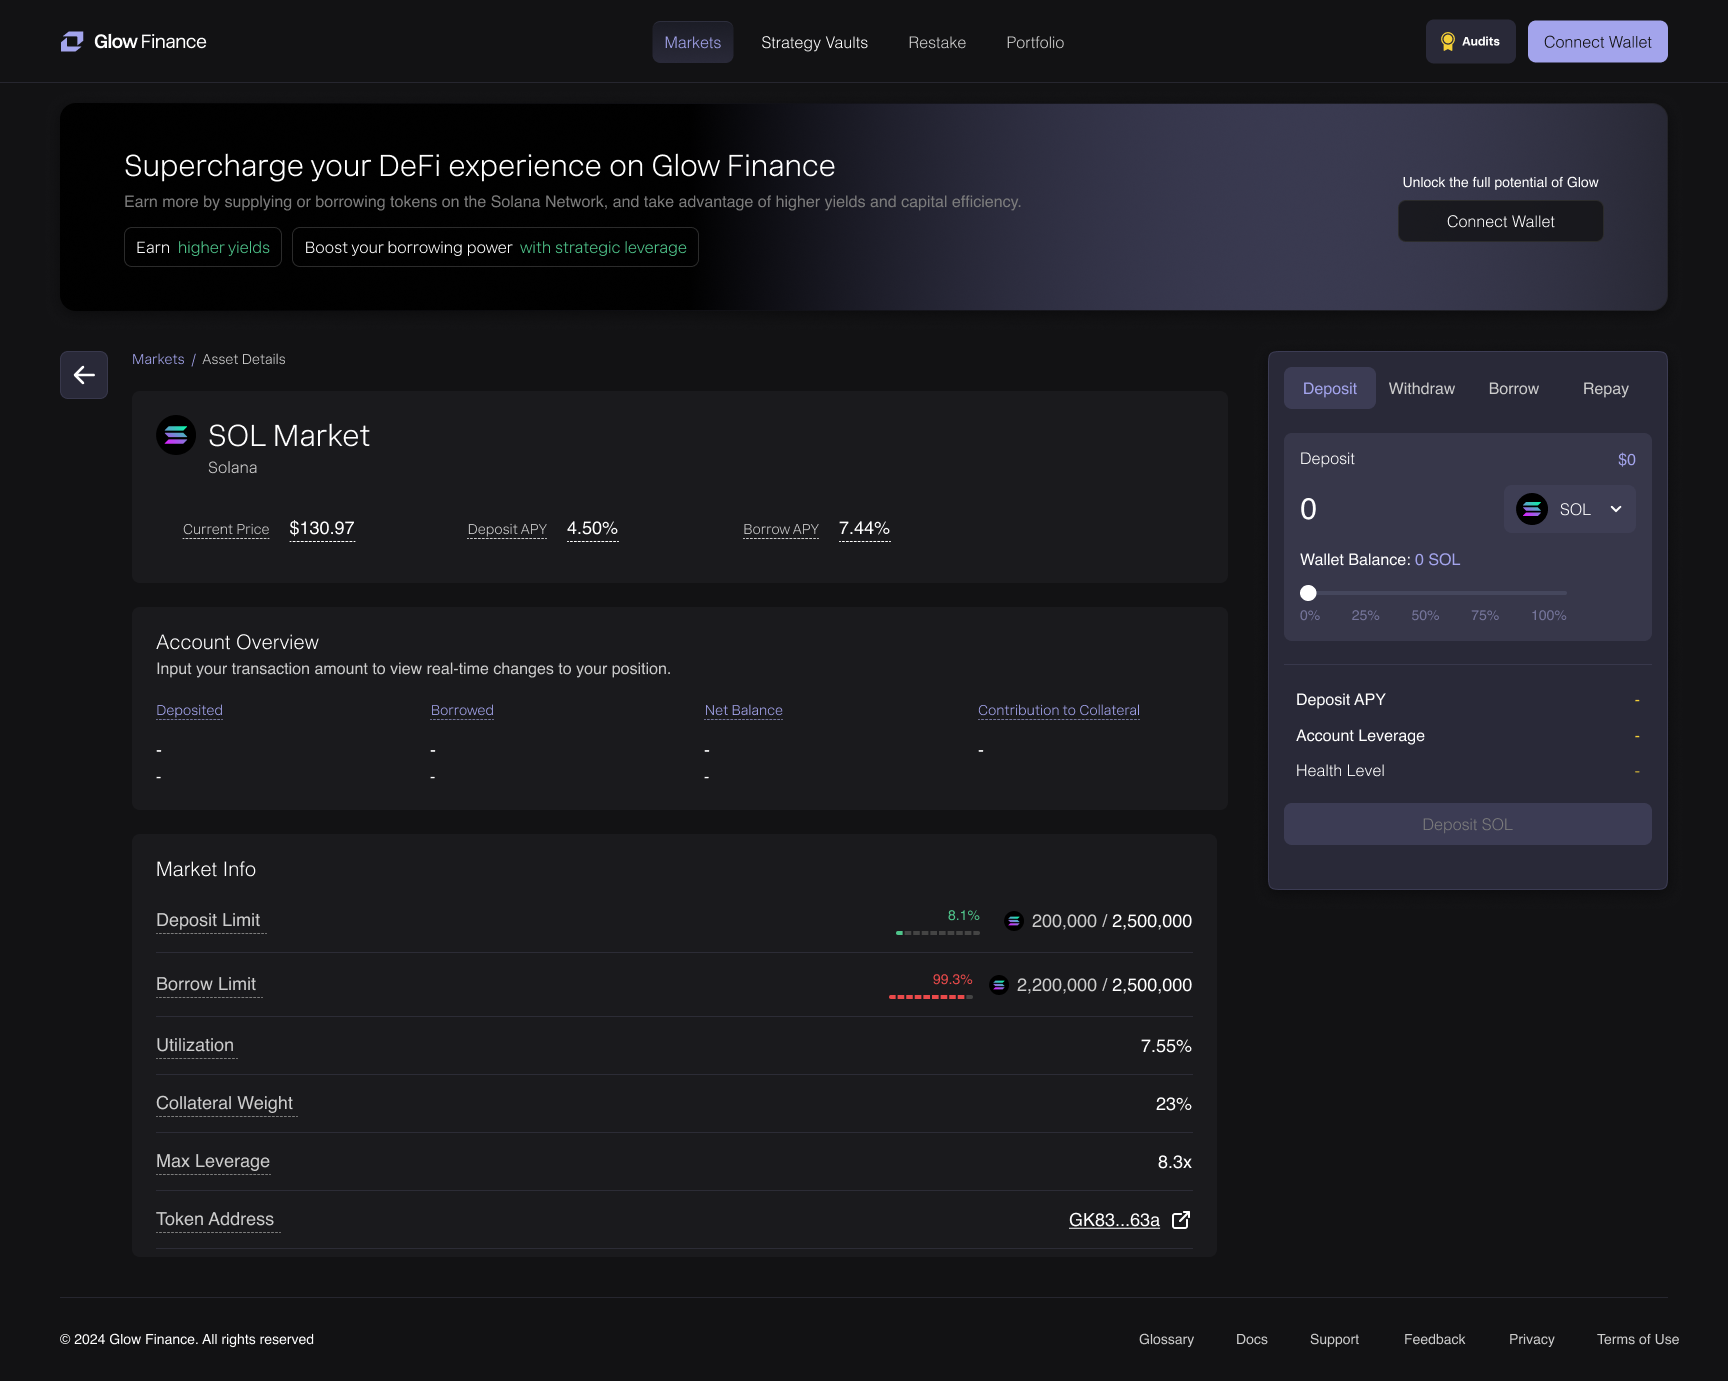
- Navigate to the Glow website and click either of the Connect Wallet buttons in the top right section of the web app.
- Select your preferred wallet from the available options.
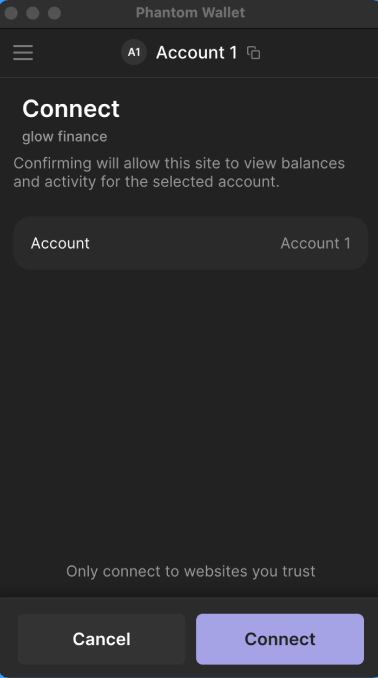
- Approve the connection in your wallet interface to allow Glow to view your balances and activities.
Step 2: Access Margin Account Creation
Once your wallet is connected:
- The top menu bar changes to show the connected wallet, and can be clicked to view app settings.
- A banner at the top of the Markets page will prompt you to create a margin account. Click the Create Margin Account button. Alternatively, you may click the underlined text in the banner.
Step 3: Create Your Margin Account
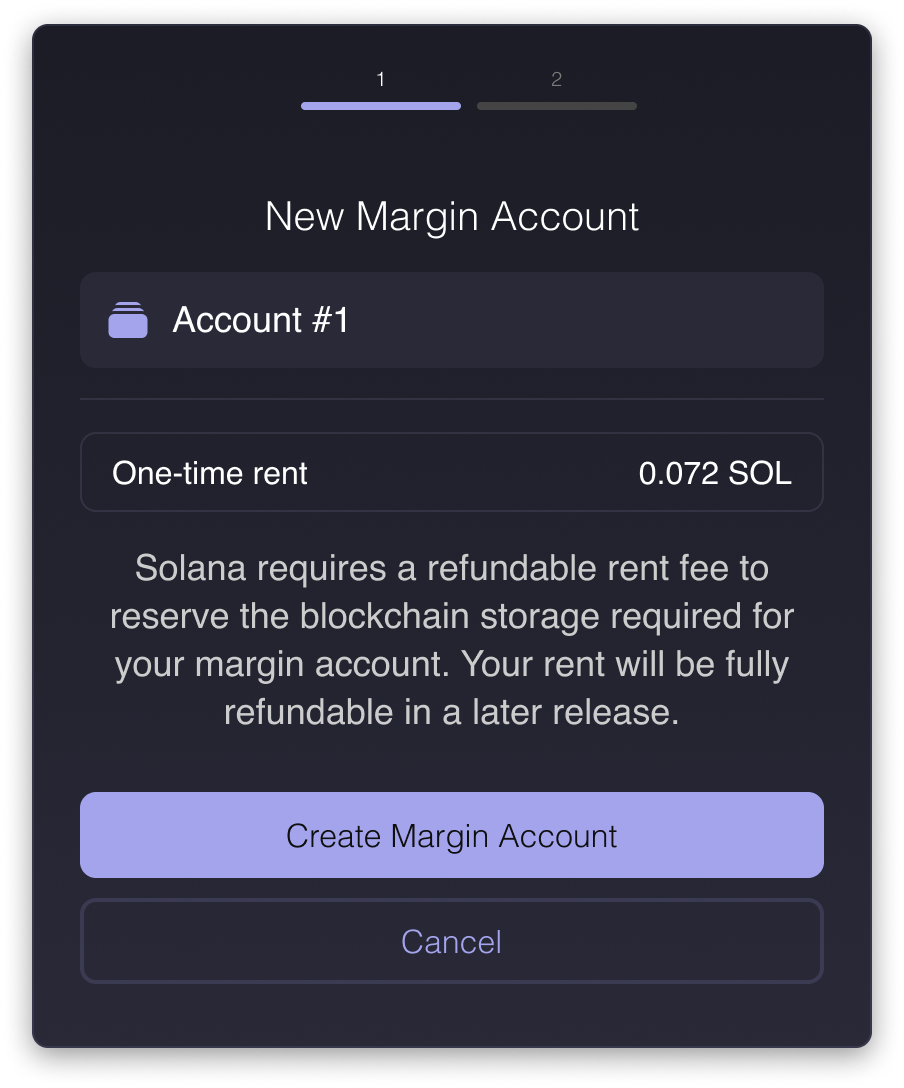
In the New Margin Account modal:
- You'll see the account name (e.g. "Account #1") and a one-time rent of 0.072 SOL.
- The modal explains that this rent fee is required by Solana and is fully refundable when you close the account.
- Click Create Margin Account to proceed. Glow will handle the full setup automatically — you'll need to approve two quick wallet transactions in sequence.
If you don't have enough SOL, the Create Margin Account button will be disabled and an error message will prompt you to add more SOL. You'll need at least 0.072 SOL plus a small amount for transaction fees.
Step 4: Confirmation
Once setup is complete, you'll receive a notification that your new margin account has been successfully created.
- If this is not your first margin account, a shortcut will appear allowing you to quickly switch to the newly created account.
- Otherwise, your current view will remain unchanged.
You can always switch between margin accounts using the account dropdown selector in the top-left corner of the margin account panel. Alternatively, visit the Portfolio page to view and manage all your accounts in one place.
- If the creation fails, an error banner will notify you of the failure. For any issues, please feel free to contact us via our Support.

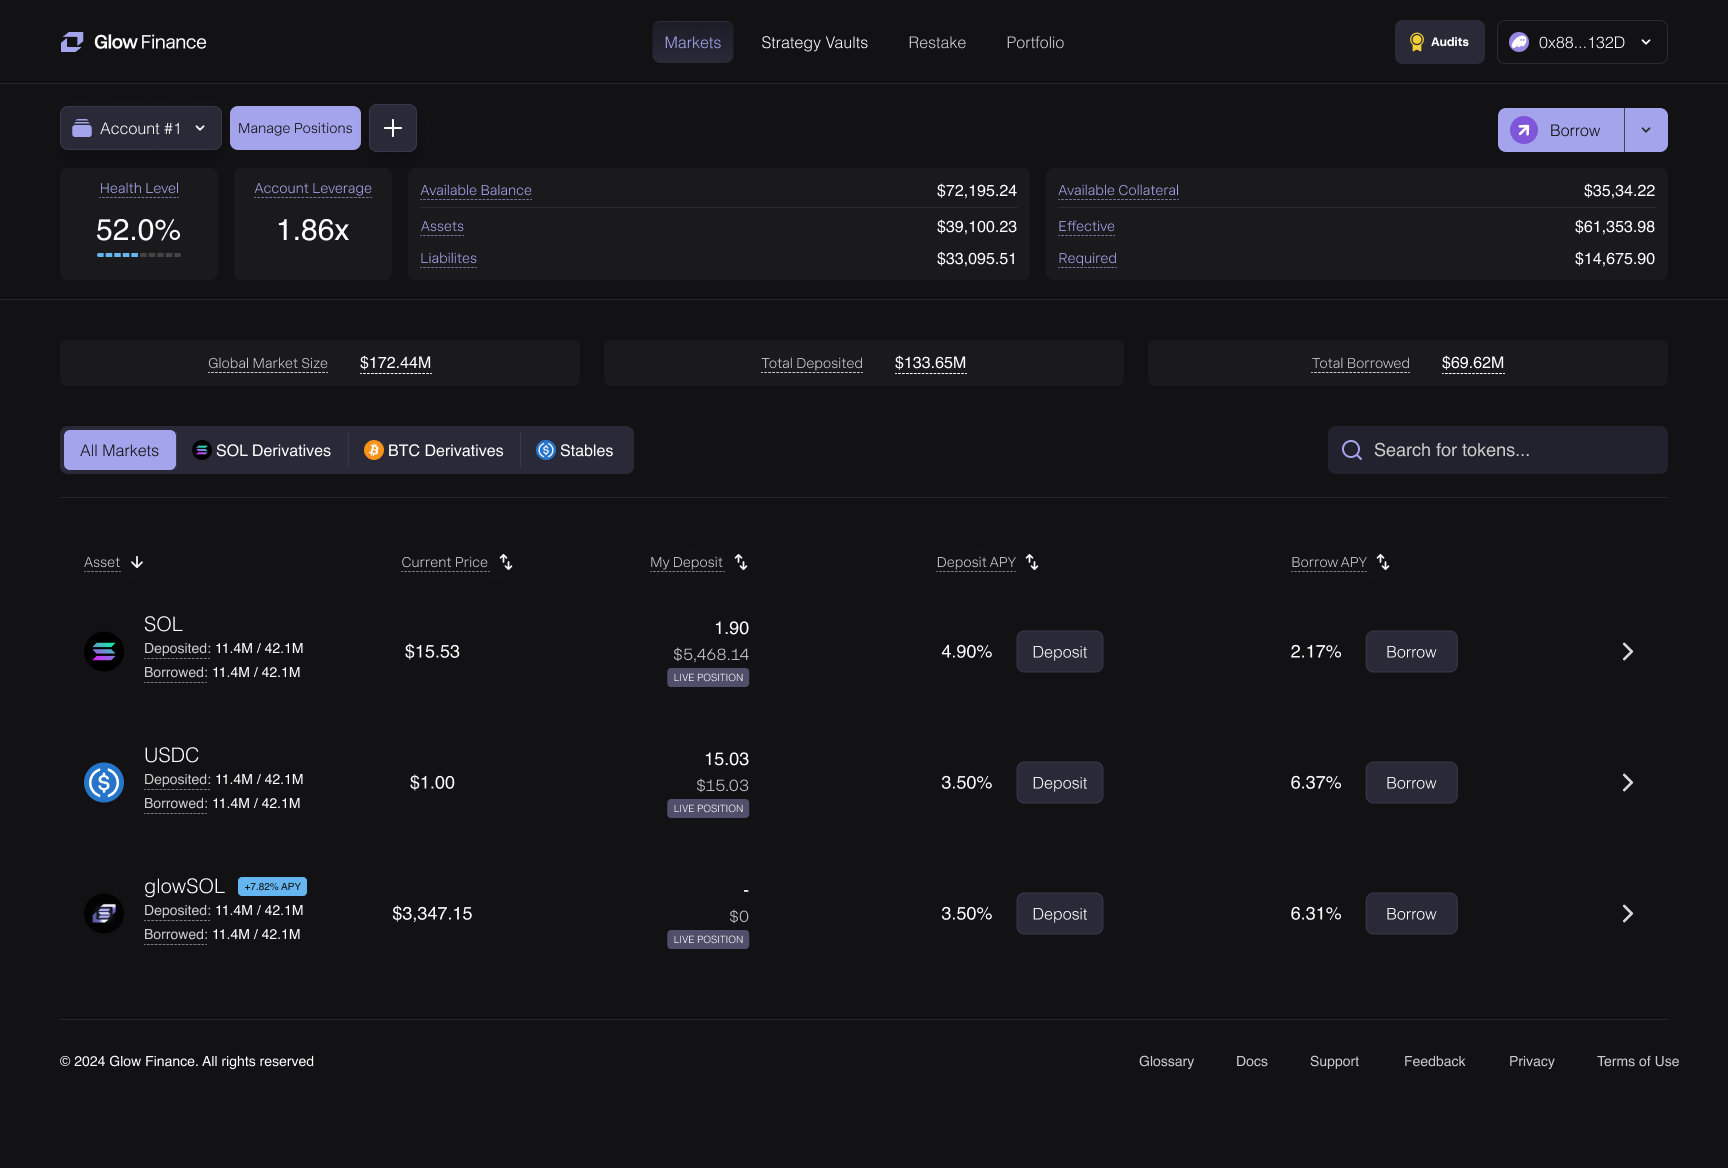
Step 5: Review Your Margin Account Panel
After successfully creating a margin account, the Markets page will update to reflect your new account. At the top of the screen, you'll now see the Margin Account Panel, which displays key stats for the currently active margin account.
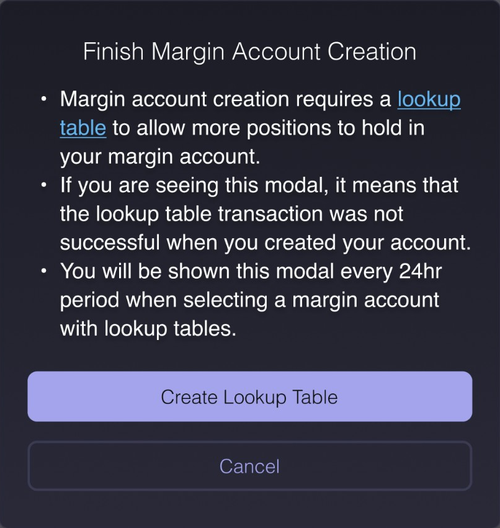
Finish Account Setup (Existing Accounts)
If you created your margin account before this step was available, you may see a "Finish Margin Account Creation" modal when selecting that account. This one-time step creates a lookup table for your account — a Solana optimization that reduces transaction sizes and allows your account to support more positions.
- Click the button to approve a single wallet transaction. If the transaction fails, the modal will stay open so you can retry.
- If you dismiss the modal, it will reappear once every 24 hours when you select that account on the Markets or Portfolio page.